March 9th 2023 update: now working for both Premiere and FCPX
Continuing with my obsession of fixing conform issues through scripting (see my other script to fix framerate issues), this time I'm tackling framing! 
In my experience, one of the most time consuming parts of conforming edits coming from Premiere into DaVinci Resolve, is fixing framing issues that arise when edits/clips use the "Scale to Frame Size" setting in Premiere.

This setting is designed to fit the whole clip into the sequence frame (with black bars if the aspect ratio is different), while keeping the "Scale" value at 100%. This is the equivalent of "Fit" or "Scale entire image to fit" setting in Resolve.

I always advise editors against using it, especially on a clip-by-clip basis, but usually once it comes to me, it's too late and I know I'm in for a fair amount of manual matching.

FCPX has the same (or opposite, actually) issue, when using a different Spatial Conform setting from the default "Fit". If clips have been set to  "Fill" or "None", any pan/tilt changes will come through incorrectly. I don't get as frustrated by it because I seldom encounter projects coming from FCPX in my professional work, and the default "Fit" is usually the best choice, but once in a while it makes sense to use "Fill" when your source footage is a different aspect ratio from your sequence.

"Scale to Frame Size" in Premiere, in the right-click contextual menu of a timeline clip

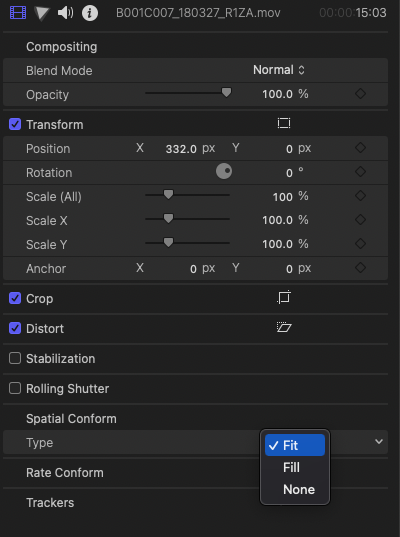
The Spatial Conform setting in FCPX's inspector

For this walk-through I will be using the example of a Premiere sequence, but note it works exactly the same for FCPX. The script fixes framing issues caused by "Scale to Frame Size" in Premiere, or by the "Fill" and "None" settings in FCPX.
Take a clip in Premiere where "Scale to Frame Size" has been used, and has been subsequently reframed (zoomed-in, pan/tilted).

The resized/reframed clip in Premiere - note the Scale value (151%)

Using this setting isn't ideal for a few reasons, one of them being that once the clip has been scaled down to fit the frame, zooming back in won't use the original resolution, and result in a loss of quality (in Premiere only - in FCPX, or once brought into Resolve, it uses the full resolution regardless of that setting).

The other reason is the one that brought me to write this script: clips with non-default scaling settings don't come through properly to Resolve in an XML/FCPXML.

The issue only arises when the clip has been "reframed" after the scaling. Additional zoom comes through fine, but any X/Y (pan/tilt) position change will be off, because in Resolve that position change is dependent on the resolution of the clip at 100% size (which is different based on which setting you choose), rather than the resolution of the timeline (which is constant, and is how Premiere and FCPX work out how much to move your clip by - if you add 50 to your X or Y value, you're moving your clip by 50 pixels).

When creating a project in Resolve, you can choose a default Input Scaling for all clips being added to a timeline:

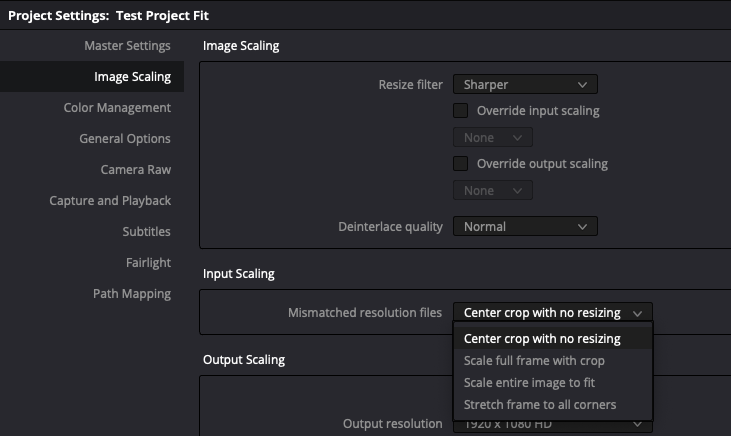
The Input Scaling dropdown in the Project settings (default is "Center crop with no resizing")

The default "Crop" setting is the correct one for Premiere sequences when "Scale to frame size" hasn't been used. It is the most reliable one and results in correct reframings when shots have been zoomed/panned/tilted.
It can be changed at the project level to "Scale entire image to fit" if all clips on the timeline have used the "Scale to frame size" setting in Premiere, or can be overridden at the clip level in the "Retime and Scaling" section of the Inspector, on the Edit Page
Similarly, the correct setting for most FCPX edits is "Scale entire image to fit", though there is some extra information in the FCPXML that means the right Spatial Conform setting is set "correctly" for each individual clip regardless of the project settings. I'm using quotes around the word "correctly" because while the Zoom level always comes out right, the X/Y position is wrong for clips that aren't the same resolution as the sequence and have been panned/tilted.
Sometimes it can be quite subtle, but because the pan/tilt is calculated based on the size of the clip instead of the sequence, the bigger/smaller your clip is compared to your sequence, and the more you move it, the more obvious the difference is.

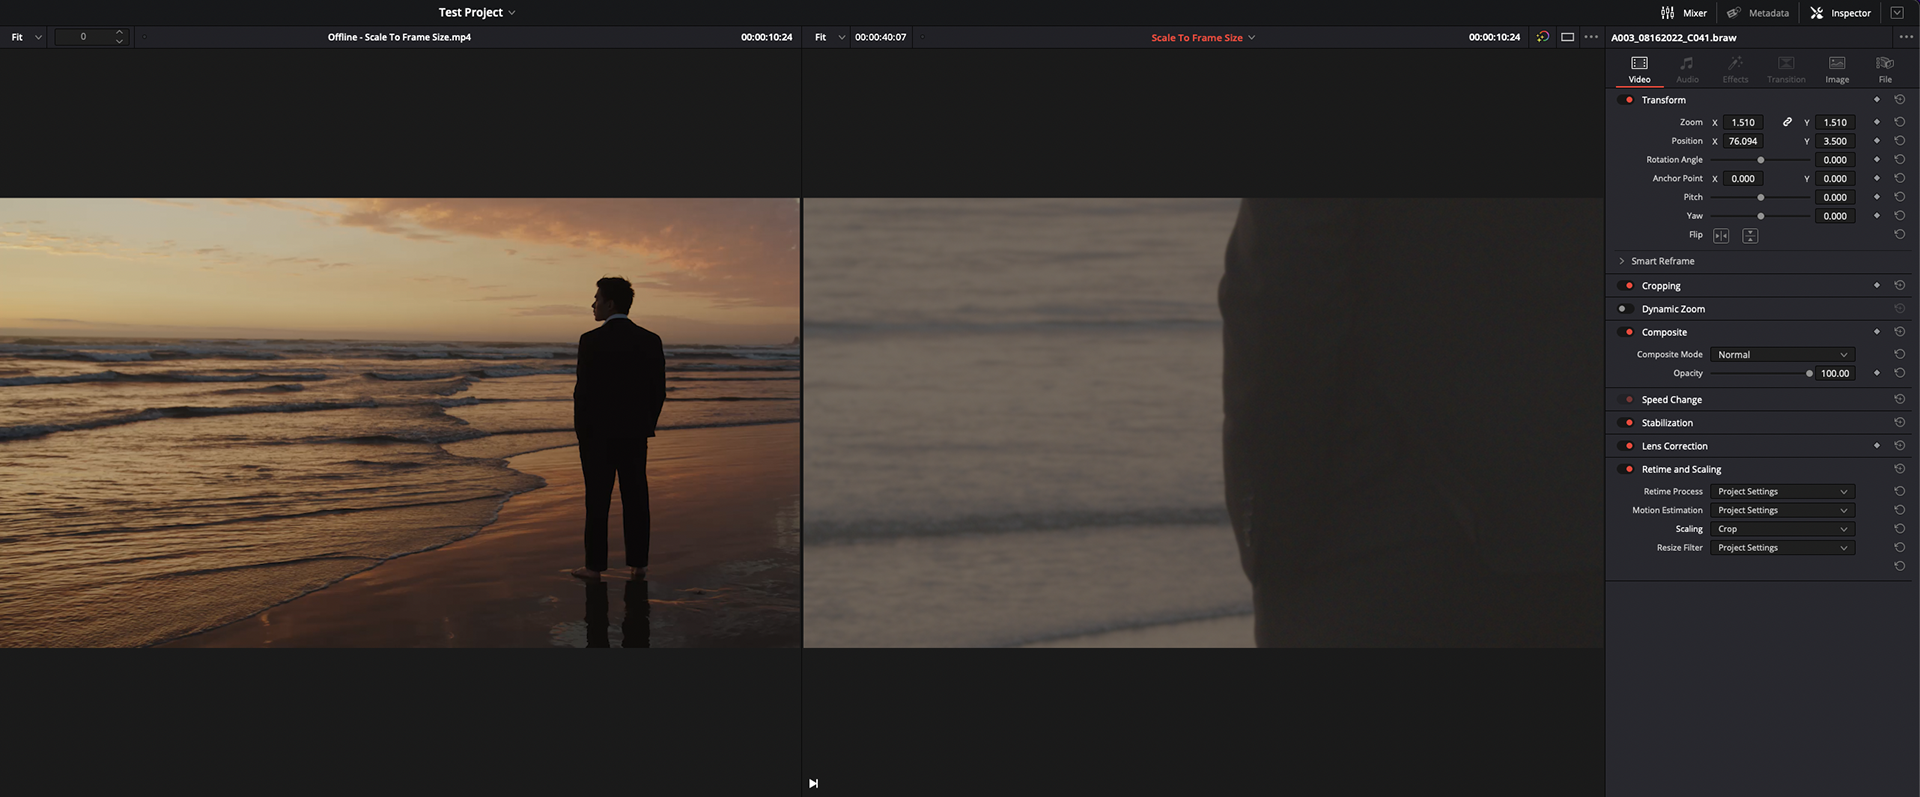
The Premiere sequence brought into Resolve via XML, with the "Scale entire image to fit" input sizing setting. The scale is completely off (reference on the left)

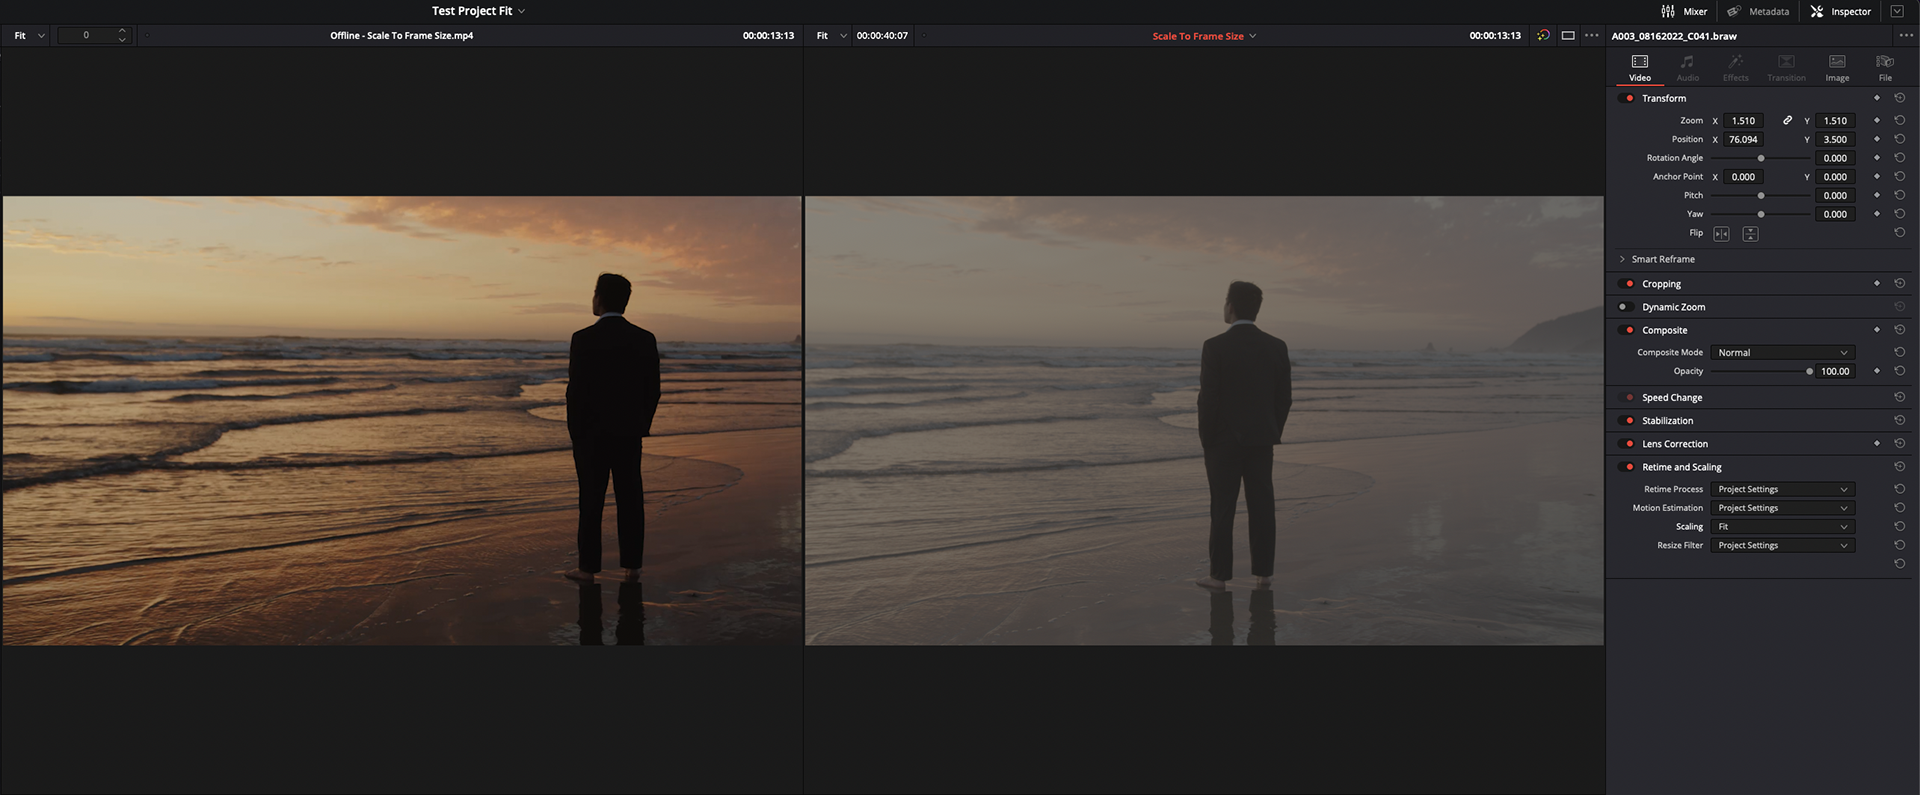
The same sequence with the "Fit" input sizing setting. The scale is correct, but the pan/tilt is wrong (reference on the left)

Before I wrote this extension, there were two approaches to fixing the issue:
- manually change the Scaling setting to "Fit", but having to adjust the X/Y position by eye
- leave the default scaling setting and manually adjust the Zoom level (either by mental maths or by eye)
This has always been a very frustrating process for me, because it's a waste of time and there's a certain degree of "eh, that's close enough" when matching clips by eye that can create issues.
That's where the extension comes in.
The idea here is to do some maths to figure out what the right sizing value should be, based on the sequence size and the clip size. 

As a basic example, if you put a 3840x2160 clip on a 1920x1080 timeline, a clip that comes in at 100% "Scale to frame size" setting should be updated to 50%. The script does that, accounting for aspect ratio, etc...

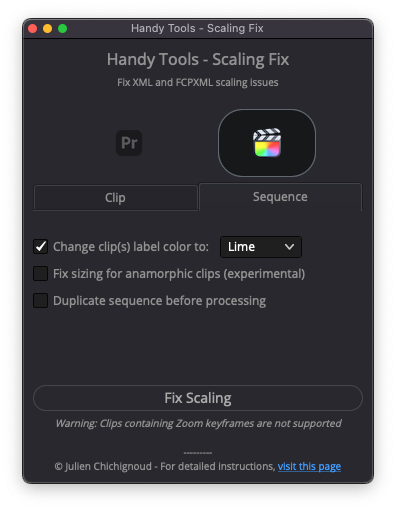
My extension, found in the Workspace > Workflow Integrations submenu

The result after running the script. The scale has been automatically recalculated and updated to match the framing (now 0.236, or 23.6%), the pan/tilt now matches the reference.

The way the extension works is the same whether the timeline comes from FCPX or Premiere, with an extra step for Premiere timelines to account for the fact that the XML format doesn't bring in the "Scaling" information.  The clips have to manually be set to "Fit" for the extension to know the fix should be applied to them (it can be done as a batch; select all the relevant clips and changing the setting in the Inspector).
The extension also has a couple self-explanatory options, to change the clip label colour after processing (useful to know which clips have been reframed and double-check against a reference export), as well as an option to duplicate the sequence (highly recommended in case of any issues).
The extension is now available to purchase on my Buy Me A Coffee page, your support will be immensely appreciated and allow me to keep developing new tools for Editors and Colourists to 
Back to Top