

There's long been issues with using Custom LUTs in Premiere.
The original recommended workflow was to use the "Browse" option in the LUTs dropdowns and navigate to your .cube file.
The original recommended workflow was to use the "Browse" option in the LUTs dropdowns and navigate to your .cube file.
Starting with Premiere 12.1.2, Adobe added a custom location to place LUTs in so they can appear in either the "Input LUT" dropdown of the Basic Correction section, or in the "Look" dropdown of the Creative section of the Lumetri panel.
I first wanted to test how both these options behave in a multi-user (or multi-computer) workflow. Does Premiere keep the link to the LUT if the .cube file isn't on a computer?
I set up a test with the LUTs in 3 locations:
I set up a test with the LUTs in 3 locations:
- In Adobe's recommended folder
- In the same folder as the project file
- In a random folder that Computer B won't have access to

Footage "Graded" on Computer A, with different locations for the custom LUTs

Result of opening the same project on Computer B
So as you can see, the only way the LUTs travel with the project is with the LUTs in the folders recommended by Adobe. Makes sense, even though I hoped that saving the LUT next to the project file would mean that Computer B could find it when opening.
One thing to note is that the red grid pattern when LUTs are offline only shows up in "Software Only" mode. If the project is set to OpenCL/Metal/CUDA, the whole screen is black. There is no error message of any kind indicating what the problem might be.
One thing to note is that the red grid pattern when LUTs are offline only shows up in "Software Only" mode. If the project is set to OpenCL/Metal/CUDA, the whole screen is black. There is no error message of any kind indicating what the problem might be.
Still, it seemed like the workflow recommended by Adobe was the solution to all LUT issues. Once the LUT is added to that folder, it will travel with the project (and even if it is deleted from the original computer where it was set up, it will still be applied to the footage. If you click on the Dropdown menu and select another look, that Custom LUT will be lost and you won't be able to apply it again unless it's in the custom folder, though.
Except...!
This workflow does introduce one very big bug though. That has to do with the built-in LUTs and Looks that are already present by default in Premiere.
Here's a test where I put my Custom LUTs in the recommended folder, and used the built-in Amira LUT and "SL Blue Steel" look:
Here's a test where I put my Custom LUTs in the recommended folder, and used the built-in Amira LUT and "SL Blue Steel" look:
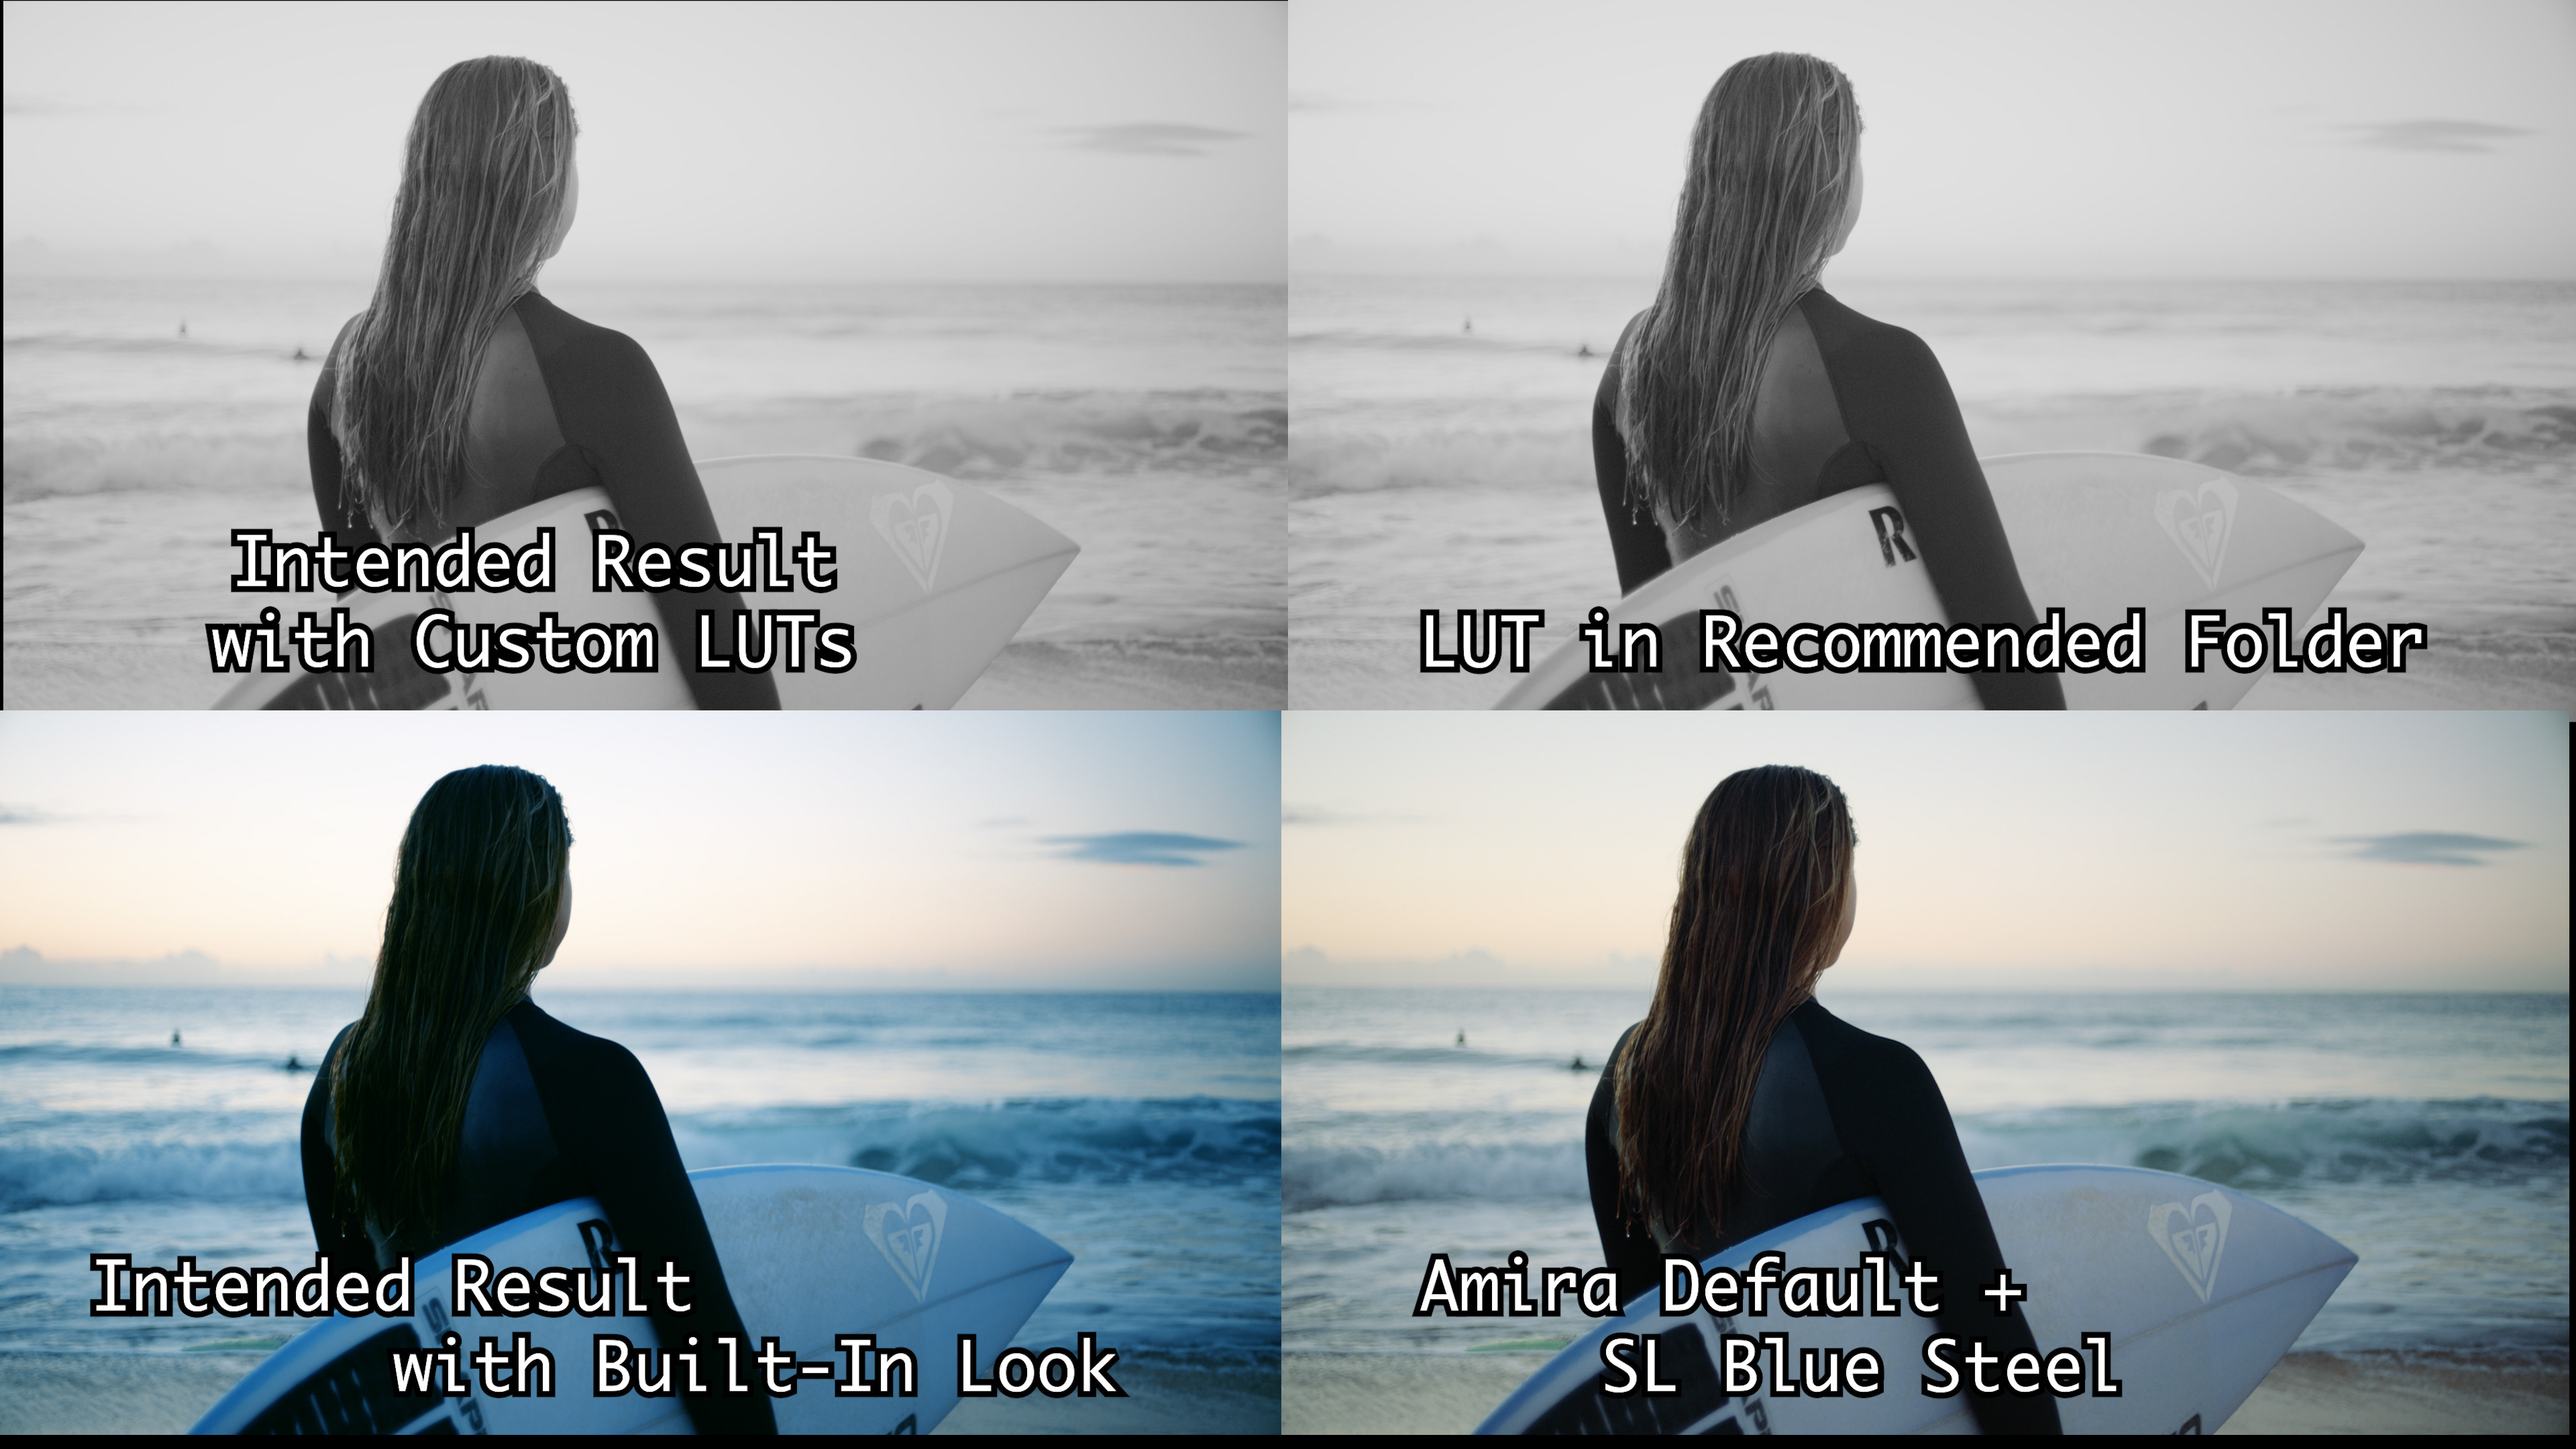
The Custom LUTs work fine but the built-in look is wrong!
As you can clearly see, the Bottom Right image looks completely different from the Bottom Left one... What's going on?
Here's a screenshot of the Lumetri panel on Computer A (Left/Top) and Computer B (Right/Bottom)
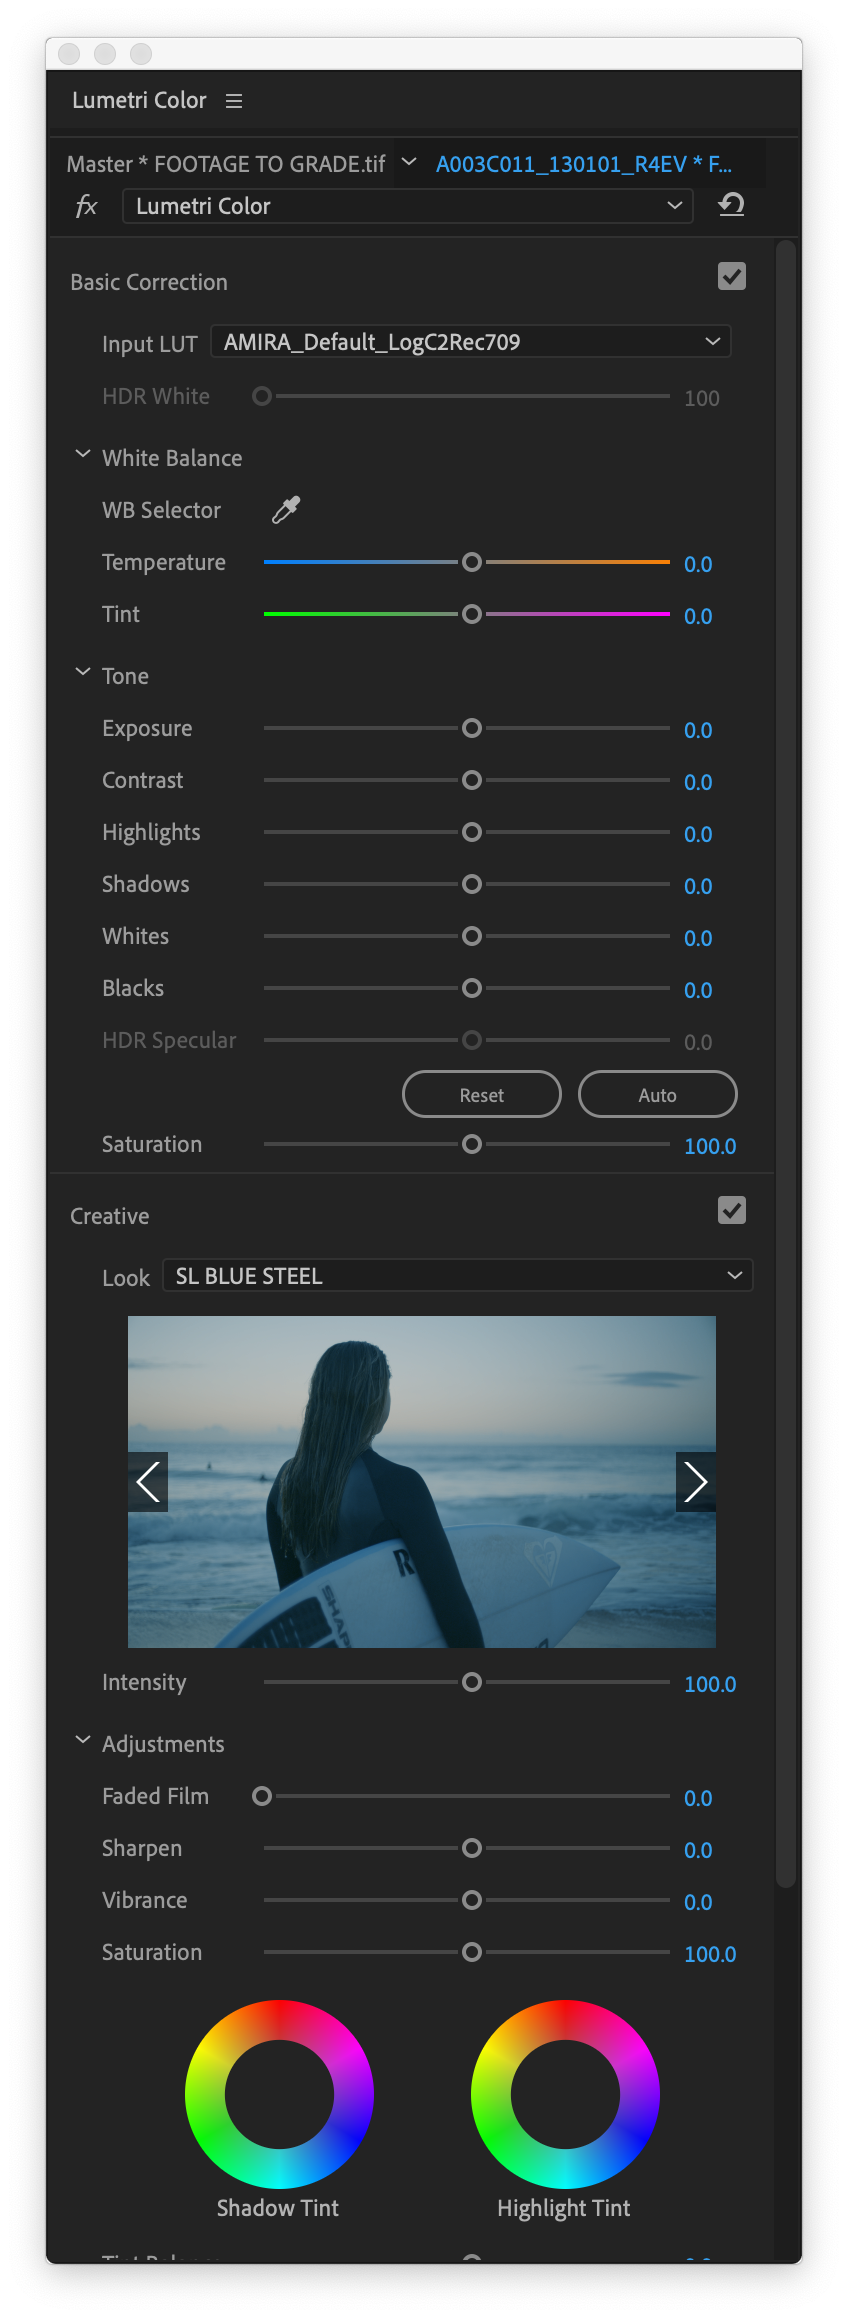
Computer A
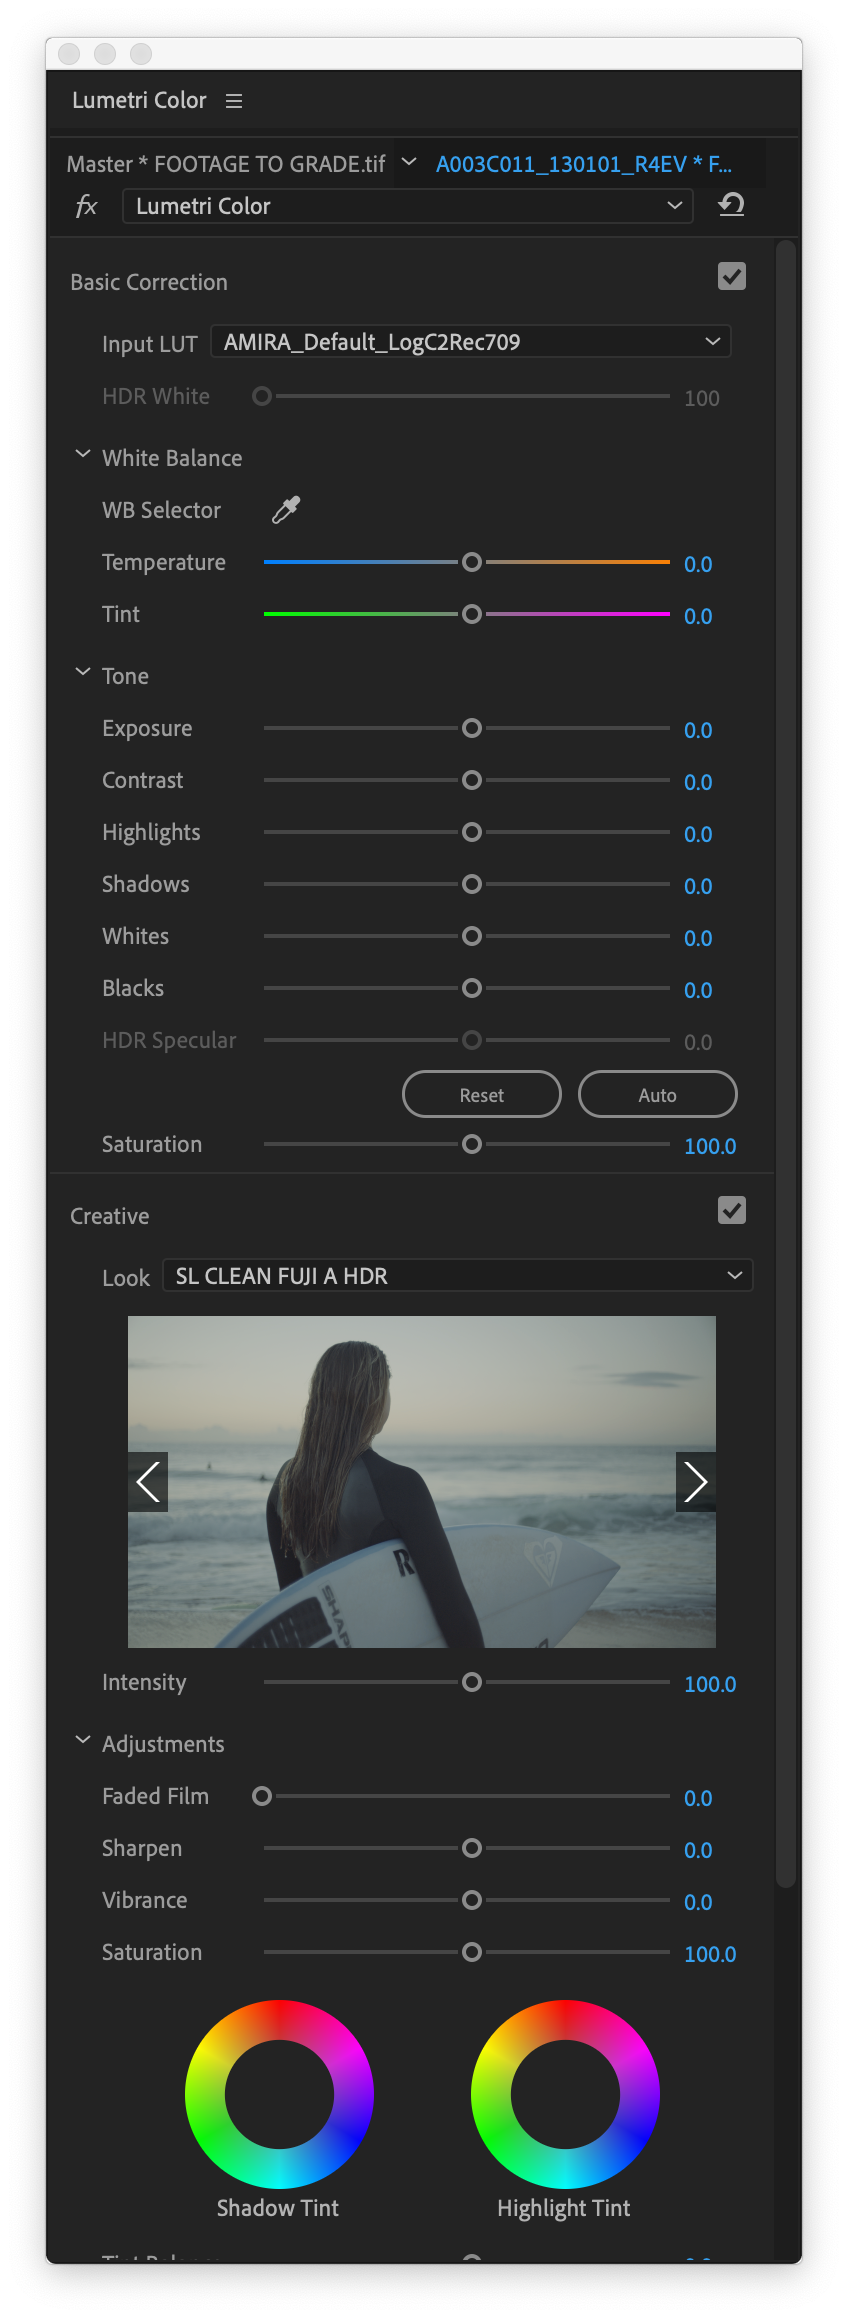
Computer B
Computer B has loaded the right Input LUT (Amira Default) but the wrong Look (SL Clean Fuji A HDR). Why is that?
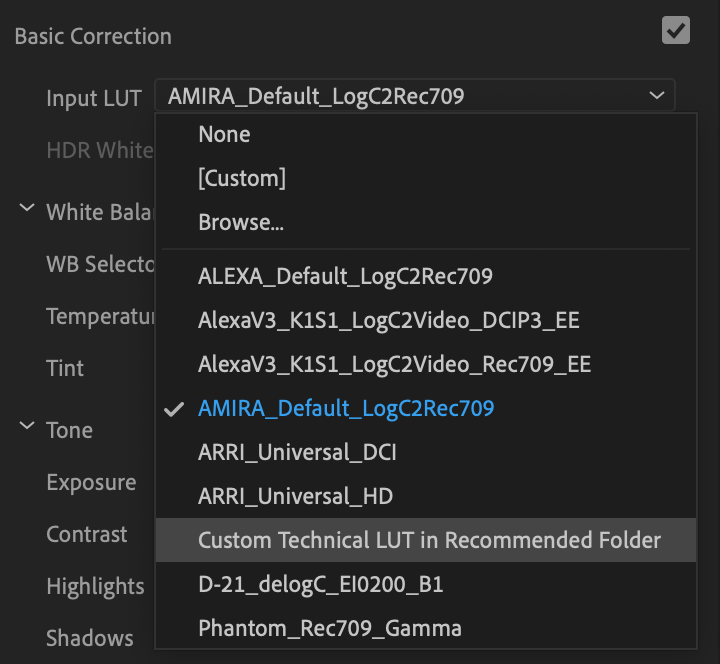
The problem has to do with the Custom LUTs added to the recommended folder. When they show up in the dropdown menu, they affect the position of all the existing LUTs in the list, and it looks like Premiere uses that list position, rather than the name of the LUT, to load up the correct/wrong LUT.
The problem has to do with the Custom LUTs added to the recommended folder. When they show up in the dropdown menu, they affect the position of all the existing LUTs in the list, and it looks like Premiere uses that list position, rather than the name of the LUT, to load up the correct/wrong LUT.
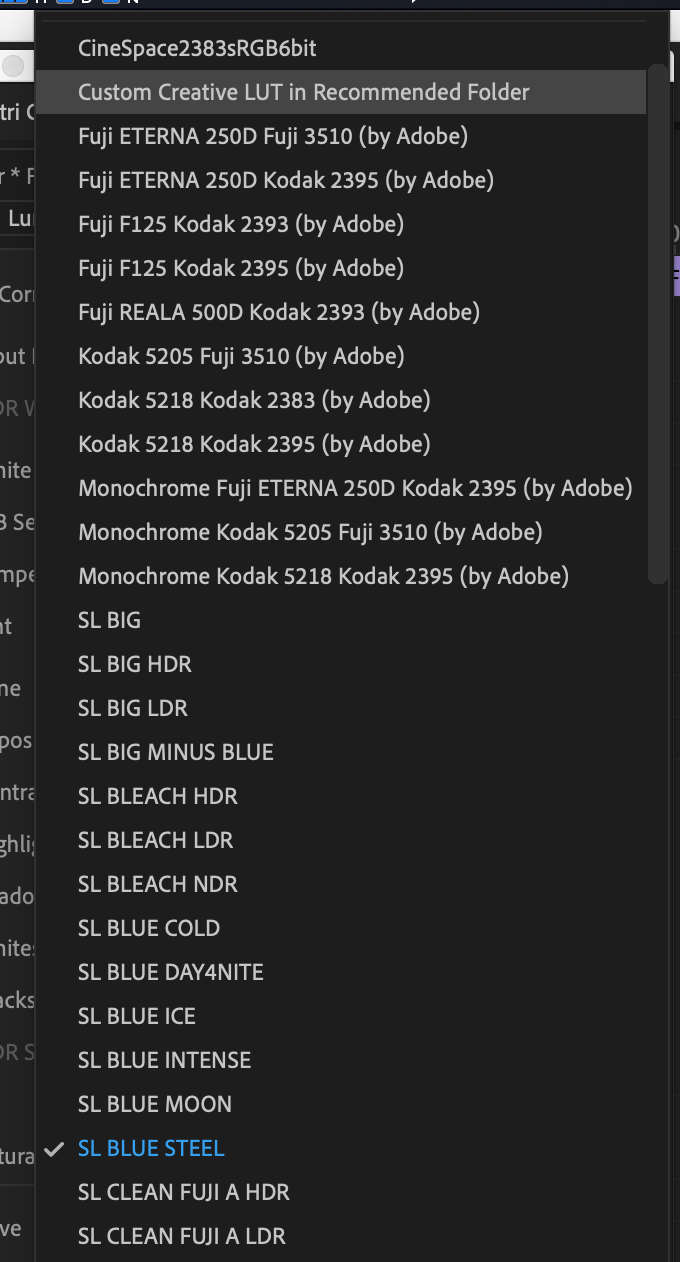
In this case, the Amira LUT is the 4th one in the list. Because my custom look is named "Custom Technical LUT...", it shows up further down alphabetically and doesn't affect this specific clip.
But the SL Blue Steel look is the 25th in the default list, and comes after "Custom Creative LUT..." in alphabetical order, which means it gets bumped to #26 once I add the LUT to the recommended folder. It works fine on Computer A, but on Computer B, which doesn't have anything in that folder, #26 is "SL Clean Fuji A HDR", which is what gets loaded instead...
So what's the solution?
This problem really makes LUTs unusable in Premiere. It might be fine in a controlled workflow where all computers and users have access to the exact same LUT list, but there's a lot of room for mistakes, some of which might not be as obvious as the one in the screenshots I took, if you have looks in the list that look a lot more similar to each other.
There is one solution to make it semi-reliable though:
Name all your Custom LUTs so they show up at the end of the alphabetical list
My solution is to prepend "zz_" to the name of any LUT I add to the recommended folder. This seems to be quite reliable, as it travels with the project , if I need to share it with a client or another freelancer, and it doesn't affect the built-in looks. The one thing it won't account for is if that client or freelancer has added looks to the recommended folder without using this method, and I've used built-in looks/LUTs, it will not relink properly and the result will be wrong.
So this needs a fix on Adobe's part, but at least in the meantime I hope this helps make LUTs usable for some people in semi-controlled workflows.